A pre-listing home inspection is a critical step in the selling process. It provides a thorough evaluation of the property’s condition, helping your potential buyer make informed decisions.
Whether you’re a first-time seller or a seasoned real estate investor, preparing for a home inspection is essential. In this guide, we’ll walk you through the steps to ensure you’re ready for the inspection, which can help you avoid unexpected surprises and potentially save you money in the long run.
1. Choose a Qualified Home Inspector
If you’re a seller wanting to schedule a pre-sale inspection, the first step is to select a qualified home inspector. You’re best served to choose someone with a good reputation that is well-documented. Reading customer reviews and hearing what others say about the inspection company can also be helpful.
A skilled home inspector will provide a comprehensive report and help you understand the property’s condition. Also, be prepared for the inspection to last a few hours, depending on the size and complexity of the home.
2. Goal of the Pre-Listing Home Inspection
When working for a home seller on a pre-listing home inspection, our goal, as an inspector, is to help identify any major items that will come up later on an inspection during the sales contingency period and help you to address them up front, on your terms. By removing obstacles to a potential sale, the goal is to sell your home faster, and for more money.
By giving an informed buyer a seat at the table, ideally, they feel comfortable that an unbiased, thorough home inspection has been performed. Accordingly, they should now feel knowledgeable enough about the property to not have any surprises come up during the sales process that would make them walk away from the sale. No failed sales is the goal.
Additionally, as the home seller, it is ideal to be in control of any major repairs on your terms before the house hits the market. That way you can interview and solicit bids from contractors of your choice to make repairs on a budget that you are more in control of. When negotiating major repairs during a sales contingency period, the home seller is often presented with bids from contractors without having adequate time to do their own research and solicit bids from contractors.
The repair price presented by the buyer may or may not be a fair price for the services that were bid on. One example is that the cost for a roof replacement can vary wildly, with some bids being up to twice the amount of other bids. You may end up reducing the price of your home in the negotiation by more than the repair is worth.
That is one example how entering the sales process unprepared can potentially cost you a lot of money.
 Our recommendation is to go through your pre-listing home inspection report, and have a discussion with your realtor about any major items, if any, that should be addressed before the house goes on the market so that the sale goes smoothly. Your realtor should be well versed in this area and be able to help you pick and choose what, if anything, you should address regarding repairs.
You should also interview and solicit bids from multiple contractors for any major repairs, and select the one you feel comfortable with. Whether you choose to do the repairs in advance of the house going on the market, or just use the cost information in negotiations, we absolutely do not recommend selecting a contractor based solely on price. It may be money wasted if the repair is poorly done or insufficient and may only come up on a future home inspection anyway. Select contractors with solid reputations, and a fair price.
Once again, your realtor may likely be able to help you with contractors, as they have likely helped guide many customers in the past to do the exact same sort of repairs. Realtors often have a solid list of contractors that they have history with and trust to do good, fair work.
3. Clean and Declutter
First impressions matter, even for homes. A clean and clutter-free home not only leaves a positive impression but also makes it easier for the inspector to do their job.
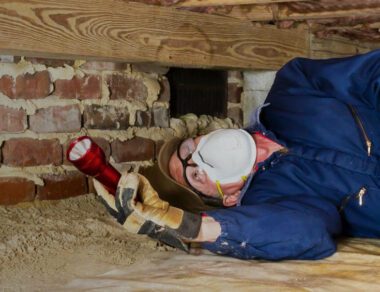
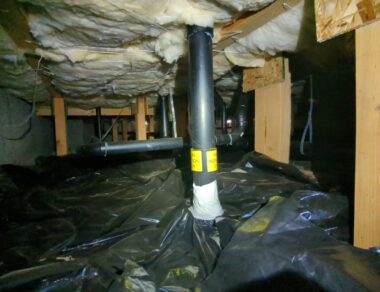
Homeowners should remove any obstacles that might impede the inspection process. The inspector will need access to all areas of the home, including the attic, crawl spaces, and utility areas, so make sure they are easily reachable.
Crate any pets that may potentially escape the home during the inspection, or that may harm the inspector. As inspectors, we’ve all seen pets escape the home during the many door openings as we go in and out during the inspection. Sometimes they even jump in the crawlspace when the hatch is open. Some inspectors even have had animals attack or bite us because they feel they are defending their territory, which really puts a damper on a home inspection.
4. Organize Your Documents
Gather all relevant documentation related to the property, such as permits, warranties, and service or repair records. Having this information on hand can help the buyer of your home understand the history of the property and identify any potential issues that may have been addressed in the past.
5. Test Smoke and Carbon Monoxide Detectors
Make sure that smoke detectors and carbon monoxide detectors are functioning correctly. If any aren’t working, replace the batteries or the units themselves. This simple step demonstrates your commitment to home safety and could influence the inspector’s evaluation.
Replace any smoke alarms older than 10 years, and any CO alarms older than 5 years as recommended by the NFPA (National Fire Protection Agency).
Ensure smoke and CO alarms are located in the required places of your home prior to listing.
6. Check for Leaks
Leaks in faucets, sinks, or toilets should be repaired before the inspection. These leaks can be indicative of underlying issues and may raise concerns during the inspection.
 7. Maintain the Exterior
Don’t forget the exterior of your home. Trim overgrown bushes, clean debris out of gutters and from the roof. . A well-maintained exterior not only enhances curb appeal but also gives the impression that the entire property has been cared for.
8. Address Minor Repairs
Identify and fix minor issues that are easy to address. This includes repairing loose handrails, replacing missing or damaged shingles, and fixing broken windows. These small repairs can make a big difference in the overall impression of the property.
9. Plan for Pest Inspections
If your area is prone to pest infestations, consider having a separate pest inspection conducted. Address any pest-related issues before the home inspection to prevent potential complications.
10. Provide Necessary Access
Make sure you provide the inspector with all necessary access for areas like the garage, shed, or any locked rooms. Ensure the crawlspace hatch is cleared for entry, the attic hatch is accessible, and all major appliances and the electrical panel have clear unfettered access to them for inspection. This ensures that the inspector can thoroughly assess every part of your home and avoids repeat visits to finish the report which will cost time and extra money.
11. Be Open to Feedback
After the inspection, the inspector should give you a verbal summary about the big picture of the inspection. Discussion around any major findings will help guide you on the next steps. Also, you should ask the inspector any questions you have about the inspection or next steps. You should also be open minded about feedback. A good inspector will provide valuable insights into the property’s condition and make maintenance and repair suggestions based on what they see commonly in many home inspections in our area.
By taking these proactive steps, you’ll be well-prepared for a home inspection and increase the likelihood of a smooth and successful selling process. A little effort before the inspection can go a long way in presenting your home in the best possible light.
 7. Maintain the Exterior
